
These pine cone crafts for kids turn a free walk outside into an afternoon of making. Below are 22 easy ideas for fall, Thanksgiving, Christmas and the rest of winter, from pine cone owls and turkeys to snowy mini trees, reindeer, bird feeders and little gifts for grandparents. Each one lists the difficulty, cost, time, best ages, materials and simple steps.
Pine cones are sturdy, textured and easy for small hands to hold, so they make a great craft base for toddlers through tweens. Always supervise, keep small pine cones and tiny add-ons like googly eyes and pom-poms away from children under three, and let an adult handle any hot glue or oven steps.
Jump to
- Supplies for Pine Cone Crafts
- How to Collect and Clean Pine Cones
- Fall and Thanksgiving Pine Cone Crafts
- Pine Cone Animal Crafts
- Christmas Pine Cone Crafts
- Winter Pine Cone Activities and Nature Play
- Pine Cone Gifts Kids Can Make
- Pine Cone Crafts by Age
- Pine Cone Crafts for Kids FAQ
Supplies for Pine Cone Crafts
You only need a bag of pine cones and a few basics from the craft drawer. Gather more cones than you think you need, because kids love to choose their favorite shapes.
- Pine cones in a few sizes: big open cones for animals and trees, small cones for ornaments and garlands
- Washable tempera or acrylic paint, plus foam brushes and cotton swabs
- Tacky glue or white school glue for kids, and a low-temp glue gun for adults (or supervised kids 8+)
- Felt, construction paper and cardstock scraps for ears, wings, feathers and hats
- Pom-poms, googly eyes, pipe cleaners and buttons (for ages 3+)
- Twine, ribbon or yarn for hanging ornaments
- Extras: glitter glue, white paint for snow tips, cotton balls, sunflower seed butter and birdseed for feeders
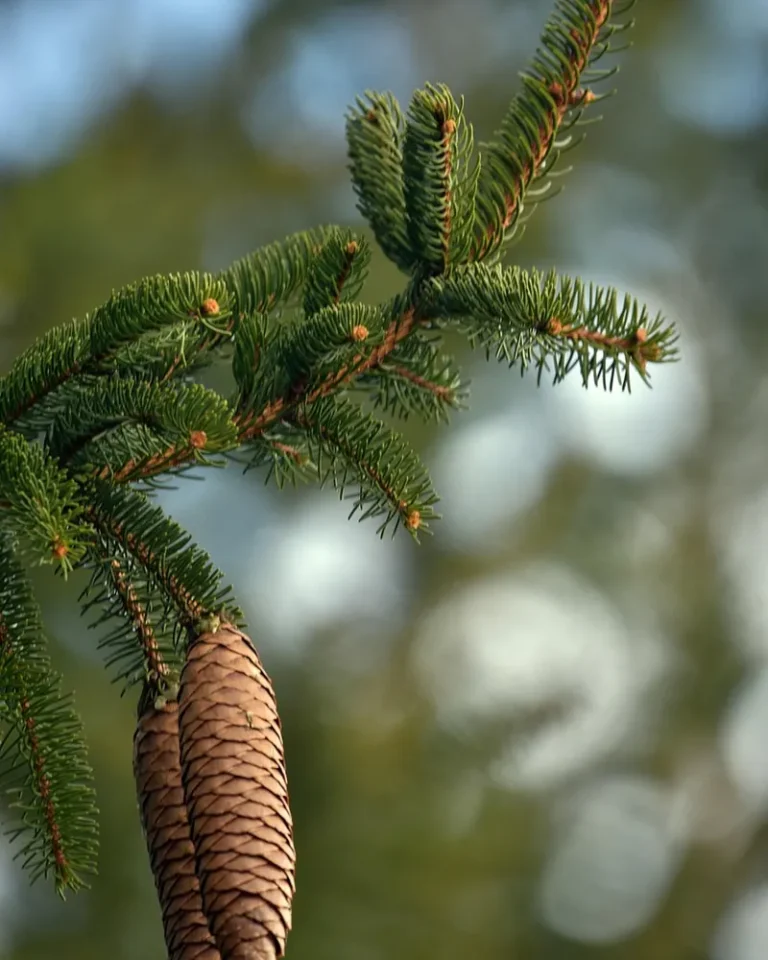
Long, narrow spruce cones work well for birds, mice and gnome bodies. Short, round, wide-open pine cones are best for owls, turkeys and mini Christmas trees.
How to Collect and Clean Pine Cones
Store-bought pine cones are clean and ready to use, but collecting your own is half the fun. Look under pine, spruce and fir trees in your yard, a park or a friend’s garden, and only pick up cones from the ground in places where gathering is allowed.
- Choose dry, open cones without mold, and shake them to knock out loose seeds and dirt.
- Soak the cones in warm water with a splash of white vinegar for about 30 minutes to loosen dirt and bugs. They will close up while wet, which is normal.
- Spread them on an old towel and let them dry for one to three days until they open again.
- To speed things up, an adult can bake them on a foil-lined sheet at about 200°F for 30 to 60 minutes. Stay in the kitchen and check often, because dry pine cones and sap can catch fire.
- Brush off any sticky sap spots, or wipe hands with a little cooking oil if sap gets on fingers.
Cleaning is a good job for preschoolers. Give them a bowl of water and a soft brush while you prepare the craft table.
Fall and Thanksgiving Pine Cone Crafts
Warm oranges, browns and yellows look beautiful on natural pine cones. For paper turkeys, thankful trees and more holiday table projects, see our Thanksgiving crafts for kids.
1. Pine Cone Turkey
Difficulty: Easy · Cost: under $1 · Time: 20 minutes · Ages: 3+
Materials: 1 large open pine cone, red, orange, yellow and brown construction paper or felt, googly eyes, glue
- Trace your child’s hand or cut five or six rounded feather shapes from colored paper.
- Glue the feathers in a fan behind the wide end of the pine cone so the cone becomes the turkey’s body.
- Cut a small brown circle for the head, add googly eyes, an orange beak and a red wattle, and glue it to the narrow front tip.
- Lay the turkey on its side and press it into a small ball of play dough so it does not roll.
Tip: Write one thing each child is thankful for on every feather and use the turkeys as a Thanksgiving centerpiece.
2. Thankful Pine Cone Place Card Holders
Difficulty: Easy · Cost: under $1 · Time: 15 minutes · Ages: 4+
Materials: small flat-bottomed pine cones, cardstock, markers, gold or white paint (optional)
- Brush the tips of each pine cone with a little gold or white paint and let it dry.
- Cut cardstock into small rectangles and have kids write a guest’s name on each one.
- Slide the name card between the scales near the top of the cone so it stands upright.
- Set one at every plate on the Thanksgiving table.
Tip: Kids can draw a tiny leaf or acorn on each card for a personal touch.
3. Pine Cone Scarecrow
Difficulty: Medium · Cost: about $1 · Time: 30 minutes · Ages: 5+
Materials: 1 pine cone, a wooden bead or a small ball of brown paper for the head, scraps of felt, raffia or yellow yarn, a marker, glue
- Glue the bead or paper ball to the top of the pine cone for a head.
- Glue short pieces of raffia or yarn around the bottom of the head to look like straw hair.
- Cut a small felt hat and glue it on top. Add a felt patch or scarf to the body.
- Draw a simple face with a marker.
Tip: Make a whole family of scarecrows in different sizes for a fall shelf display.
4. Painted Pine Cone Fall Flowers
Difficulty: Easy · Cost: under $1 · Time: 20 minutes plus drying · Ages: 3+
Materials: pine cones cut in half or wide open cones, orange, yellow and red paint, green pipe cleaners or sticks, a small jar
- Paint the tips and inside of each cone in bright fall colors. Wide, open cones look like zinnias or mums.
- Let them dry completely.
- Wrap a green pipe cleaner tightly under the bottom scales, or have an adult hot glue a stick to the base, to make a stem.
- Arrange the flowers in a small jar or a vase.
Tip: These last for years, so they make a great no-water bouquet for a teacher or grandparent.
Pine Cone Animal Crafts
Animals are the most popular pine cone crafts for kids, because the cone already looks like a fluffy body. Give children a pile of felt scraps and let them invent their own creatures, too.
5. Pine Cone Owl
Difficulty: Easy · Cost: under $1 · Time: 20 minutes · Ages: 3+
Materials: 1 round, open pine cone, felt or paper scraps, 2 large googly eyes or white paper circles, an orange paper triangle, glue
- Cut two wing shapes from felt or paper and glue one to each side of the cone.
- Glue two white circles with black dots, or large googly eyes, near the top.
- Add a small orange triangle beak between the eyes.
- Tuck tiny felt ear tufts into the top scales.
Tip: Stuff a few cotton balls between the scales on the belly for a fluffy snowy owl.
6. Pine Cone Hedgehog
Difficulty: Easy · Cost: under $1 · Time: 15 minutes · Ages: 2+
Materials: 1 pine cone, brown play dough or air-dry clay, a peppercorn or black bead (ages 3+) or a marker
- Roll a ball of play dough or clay into a teardrop shape for the face.
- Press the wide end of the teardrop onto the bottom of the pine cone, so the scales look like spikes.
- Add a nose and two eyes with tiny clay balls, a black bead or a marker.
- Let air-dry clay harden overnight if you want to keep it.
Tip: Toddlers can just squish dough onto the cone and call it a hedgehog. That counts.
7. Pine Cone Fox
Difficulty: Medium · Cost: about $1 · Time: 25 minutes · Ages: 5+
Materials: 1 pine cone, orange and white paint, orange and white felt, a black pom-pom, googly eyes, glue
- Paint the pine cone tips orange and let it dry.
- Cut a triangle-shaped face from orange felt with two pointed ears, and add a white felt muzzle.
- Glue on eyes and a black pom-pom nose, then attach the face to the wide end of the cone.
- Cut a fluffy tail from orange felt with a white tip and glue it to the narrow end.
Tip: Add a little felt scarf and the fox becomes a cozy winter decoration.
8. Pine Cone Mouse
Difficulty: Easy · Cost: under $1 · Time: 15 minutes · Ages: 3+
Materials: 1 small, narrow pine cone, pink or gray felt, a small pom-pom, googly eyes, a pipe cleaner or yarn, glue
- Cut two round ears from felt and glue them near the pointed tip of the cone.
- Glue on two small eyes and a pom-pom nose at the very tip.
- Glue a curly pipe cleaner or a length of yarn to the wide end for a tail.
Tip: Make a few and hide them on a shelf for a holiday “find the mouse” game.
9. Pine Cone Birds
Difficulty: Easy · Cost: under $1 · Time: 20 minutes · Ages: 4+
Materials: long spruce cones, colorful felt or feathers, googly eyes, a yellow paper beak, twine
- Lay the cone on its side. The pointed end is the head and the wide end is the tail.
- Glue felt wings or craft feathers to each side and a fan of feathers at the tail.
- Add eyes and a tiny yellow beak.
- Tie twine around the middle to hang the bird from a branch or window.
Tip: Paint the cones blue or red first to make bluebirds and cardinals.
Christmas Pine Cone Crafts
December is peak pine cone season. These projects make sweet ornaments and tabletop decorations, and many cost almost nothing. For paper plate Santas, handprint reindeer and more, browse our Christmas crafts for kids.
10. Mini Pine Cone Christmas Trees
Difficulty: Easy · Cost: about $1 · Time: 20 minutes plus drying · Ages: 3+
Materials: round open pine cones, green paint, tiny pom-poms or sequins, a yellow paper star, a bottle cap or small clay ball for a base, glue
- Paint the pine cone green and let it dry.
- Glue tiny pom-poms or sequins between the scales as ornaments.
- Glue a small yellow paper star to the top.
- Press the bottom into a ball of clay or glue it into a bottle cap so the tree stands up.
Tip: Line several trees along a windowsill to make a little pine cone forest.
11. Snowy Tipped Pine Cone Ornaments
Difficulty: Easy · Cost: under $1 · Time: 15 minutes plus drying · Ages: 2+
Materials: pine cones, white paint, a sponge or foam brush, glitter (optional), twine or ribbon
- Dab a little white paint on the tip of each scale with a sponge so the cone looks frosted with snow.
- Sprinkle glitter on the wet paint if you like, over a tray to catch the mess.
- Once dry, an adult can tie or glue a loop of twine around the top.
- Hang it on the tree or a doorknob.
Tip: Toddlers can roll the pine cone in a tray of white paint for a quick snowy look.
12. Pine Cone Reindeer
Difficulty: Medium · Cost: about $1 · Time: 25 minutes · Ages: 4+
Materials: 1 pine cone, brown pipe cleaners, a red pom-pom, googly eyes, ribbon, glue
- Lay the pine cone on its side. The wide end will be the face.
- Twist two brown pipe cleaners into antler shapes and tuck them into the scales at the top of the wide end.
- Glue two googly eyes and a red pom-pom nose to the wide end.
- Tie a small ribbon around the middle for a collar, or add a loop to hang it.
Tip: Make Rudolph plus a whole team, and line them up in front of a paper sleigh.
13. Pine Cone Gnome
Difficulty: Easy · Cost: under $1 · Time: 20 minutes · Ages: 5+
Materials: 1 pine cone, red or green felt, a cotton ball or white faux fur, a wooden bead or pom-pom for the nose, glue
- Roll a felt triangle into a cone-shaped hat and glue the seam.
- Pull a cotton ball into a long, fluffy beard and glue it to one side of the pine cone.
- Glue the nose just above the beard.
- Glue the hat on top so it sits low, covering where the eyes would be.
Tip: Gnomes look cute in any color, so let kids pick their own hat and add a felt pom-pom.
14. Paper Plate Pine Cone Wreath
Difficulty: Medium · Cost: about $1 · Time: 30 minutes · Ages: 4+
Materials: 1 paper plate, small pine cones, green paint, a red bow, glue
- Cut the center out of a paper plate to make a ring, then paint the ring green.
- Once dry, glue small pine cones all the way around the ring.
- Fill in gaps with pom-poms or painted pasta if you like.
- Add a red bow at the bottom and a ribbon loop at the top to hang it.
Tip: For more ring-shaped projects, see our paper plate crafts for kids.
Winter Pine Cone Activities and Nature Play
These ideas mix crafting with science and outdoor play, and they are perfect for snow days, long weekends and winter break.
15. Pine Cone Bird Feeder
Difficulty: Easy · Cost: about $2 · Time: 15 minutes · Ages: 3+
Materials: 1 large pine cone, sunflower seed butter, shortening or peanut butter, birdseed, a butter knife or craft stick, string
- Tie a long piece of string around the top scales before you start.
- Spread sunflower seed butter or shortening all over the pine cone with a craft stick.
- Roll it in a tray of birdseed until it is well coated.
- Hang it from a branch you can see from a window, and keep a list of the birds that visit.
Tip: Use sunflower seed butter or shortening if anyone in the house or classroom has a peanut allergy.
16. Pine Cone Rolling Painting
Difficulty: Easy · Cost: under $1 · Time: 10 minutes · Ages: 1+
Materials: 2 or 3 pine cones, washable paint, a shallow box or baking dish, paper
- Put a sheet of paper in the bottom of a box or baking dish.
- Add a few small blobs of paint.
- Drop in the pine cones and let your child tip the box back and forth so the cones roll through the paint.
- Lift out the paper and let it dry.
Tip: Use the finished paper as wrapping paper or cut it into gift tags.
17. Open and Close Pine Cone Science Experiment
Difficulty: Easy · Cost: free · Time: 10 minutes plus waiting · Ages: 3+
Materials: 3 pine cones, 2 clear cups or jars, warm water, cold water
- Put one pine cone in warm water, one in cold water and leave one dry on the table.
- Ask kids to guess what will happen, then check every 15 minutes.
- The wet cones slowly close up, and the dry one stays open.
- Dry the wet cones overnight and watch them open again.
Tip: Explain that pine cones close in wet weather to protect their seeds and open when it is dry so seeds can blow away.
18. Pine Cone Penguins
Difficulty: Easy · Cost: under $1 · Time: 20 minutes · Ages: 4+
Materials: 1 pine cone, black and white paint, orange felt or paper, googly eyes, glue
- Paint the whole pine cone black, then paint a white belly on the front.
- Glue on small black paper or felt wings.
- Add googly eyes, an orange triangle beak and two orange feet.
- Wrap a scrap of yarn around the neck for a scarf.
Tip: Group the penguins on a white cotton “snowbank” for a winter windowsill scene.
Pine Cone Gifts Kids Can Make
Handmade gifts from nature feel extra special. These are simple enough for kids to make on their own, with a little help on the finishing touches. For more homemade gift ideas, see our DIY gifts.
19. Cinnamon Pine Cones in a Jar
Difficulty: Easy · Cost: about $3 · Time: 20 minutes · Ages: 4+
Materials: small clean pine cones, ground cinnamon, a little white glue mixed with water, a jar or cellophane bag, ribbon
- Brush the pine cones with a thin layer of watered-down glue.
- Sprinkle cinnamon over them in a tray and let them dry.
- Pack them into a jar or a cellophane bag and tie it with ribbon.
- Add a hand-drawn tag that says “Merry Christmas from” and the child’s name.
Tip: Ground cinnamon smells lovely and is gentler than strong scented oils, but keep it away from little eyes.
20. Glitter Pine Cone Gift Toppers
Difficulty: Easy · Cost: under $1 · Time: 15 minutes plus drying · Ages: 3+
Materials: small pine cones, glitter glue or paint, ribbon
- Paint or glitter the tips of each small pine cone.
- Once dry, tie a piece of ribbon around the top scales.
- Tie the pine cone onto a wrapped present in place of a bow.
Tip: Use gold for teachers, silver for neighbors and red for family so everyone knows whose gift is whose.
21. Name Pine Cone Ornament for Grandparents
Difficulty: Medium · Cost: about $1 · Time: 20 minutes · Ages: 5+
Materials: 1 pine cone, paint, a wooden circle or cardstock tag, paint pen or marker, twine
- Paint the pine cone in a favorite color and let it dry.
- Have the child write their name and the year on a wooden circle or a sturdy cardstock tag.
- Tie or glue the tag to the top of the pine cone with a twine loop.
- Wrap it in tissue paper for a grandparent, aunt or uncle.
Tip: Make one every year and it becomes a keepsake collection on the tree. Pair it with a print from our handprint crafts for kids for a gift set.
22. Pine Cone Photo Holder
Difficulty: Easy · Cost: about $1 · Time: 15 minutes plus drying · Ages: 4+
Materials: 1 large pine cone with a flat base, paint, a small ball of clay, a printed photo or a drawing on cardstock
- Paint the pine cone in a fun color and let it dry.
- Press the base into a ball of clay so it stands steady, or glue it into a bottle cap.
- Trim a small photo or drawing to about 2 by 3 inches.
- Slide the photo between the top scales so it stands up like a little frame.
Tip: Use a school photo for a no-cost gift Grandma can keep on her desk all year.
Pine Cone Crafts by Age
Toddlers (ages 1 to 3)
Stick to big pine cones that will not fit in a mouth, and choose painting, rolling and play dough projects such as the rolling painting, the snowy tipped ornament and the play dough hedgehog. Skip googly eyes, pom-poms and small cones. For more ideas, see our easy crafts for toddlers.
Preschoolers (ages 3 to 5)
Preschoolers can glue felt pieces, paint and sprinkle glitter with help. The owl, turkey, mouse, mini Christmas trees and bird feeder are good fits. Pre-cut the shapes so they can focus on building.
School-age kids (ages 6 to 12)
Older kids can cut their own felt, use a low-temp glue gun with supervision, and design their own animals. Try the fox, gnome, scarecrow and name ornament, or challenge them to make a whole pine cone nativity, zoo or forest scene. They may also enjoy our popsicle stick crafts for kids.
Pine Cone Crafts for Kids FAQ
Do you need to clean pine cones before crafting?
It is a good idea for pine cones you collect outside. Soak them in warm water with a little vinegar, then let them dry until they open. Store-bought pine cones are usually ready to use.
Can you bake pine cones to kill bugs?
Yes. An adult can bake them at about 200°F for 30 to 60 minutes on a foil-lined sheet. Never leave the oven unattended, because dry pine cones and sap can burn.
What glue works best on pine cones?
Tacky glue is the best choice for kids because it is thick and grabs the rough scales. Hot glue holds faster, but it should be used by adults or by older kids with a low-temp gun and close supervision.
Are pine cone crafts safe for toddlers?
They can be with close supervision. Use large pine cones, skip small add-ons that could be choking hazards, and choose washable paint. Some pine cones have sharp tips, so check them first.
How do you keep pine cone crafts from falling over?
Press the bottom into a small ball of clay or play dough, glue it into a bottle cap, or trim the base flat with garden snips (an adult job).
For more seasonal projects, browse the full Kids Crafts category.
Prices are approximate and were checked at the time of writing.
