
A DIY advent calendar is one of the most useful Christmas crafts you can make in mid-November: Advent Sunday in 2026 falls on November 29, and most fill-a-day calendars still run the classic 24 days from December 1 to Christmas Eve. That gives you a couple of weekends to build one, fill it, and hang it before the countdown starts.
Below are 20 easy DIY advent calendar ideas for kids and families, from a 30-minute paper chain to a reusable wooden peg board. Each one lists difficulty, cost, time, ages, materials and simple steps. You can fill the days with sweets, tiny toys, books or (often better) little activities that do not add more sugar to December.
Supervise cutting, staples, small parts and anything that could be a choking hazard. Keep small treats, magnets, beads and beans away from children under three, and keep finished calendars away from candles, fireplaces and stoves. For more seasonal projects, see our Christmas crafts for kids, DIY Christmas decor and Thanksgiving crafts for kids if you are making something for the week before.
Jump to
- Supplies and Planning
- Paper and Envelope Calendars
- Boxes, Tins and Dollar-Store Calendars
- Kids and Family Activity Calendars
- Wood, Fabric and Reusable Calendars
- What to Put Inside
- DIY Advent Calendar FAQ
Supplies and Planning
You can make a complete calendar with things already in the house: leftover wrapping paper, lunch bags, envelopes, twine, a marker and 24 scraps of paper for notes. If you buy anything, number stickers, mini clothespins, kraft envelopes and a ball of cotton twine will cover most of the paper projects below.
Decide three things before you start. First, the start date: December 1 to 24 is the standard DIY format; add a 25th door for Christmas morning if you want, or a bonus envelope on Advent Sunday, November 29, 2026. Second, the fill: treats, activities, or a mix. Third, whether this should be recyclable (paper chain, bags) or reusable (felt pockets, wooden peg board). A reusable calendar takes longer this year and saves you every year after.
Write the numbers large and high-contrast so a child can find “today” from a few feet away. If more than one child will share the calendar, use initials on some slips, or give each child a color of clothespin so the days stay fair.
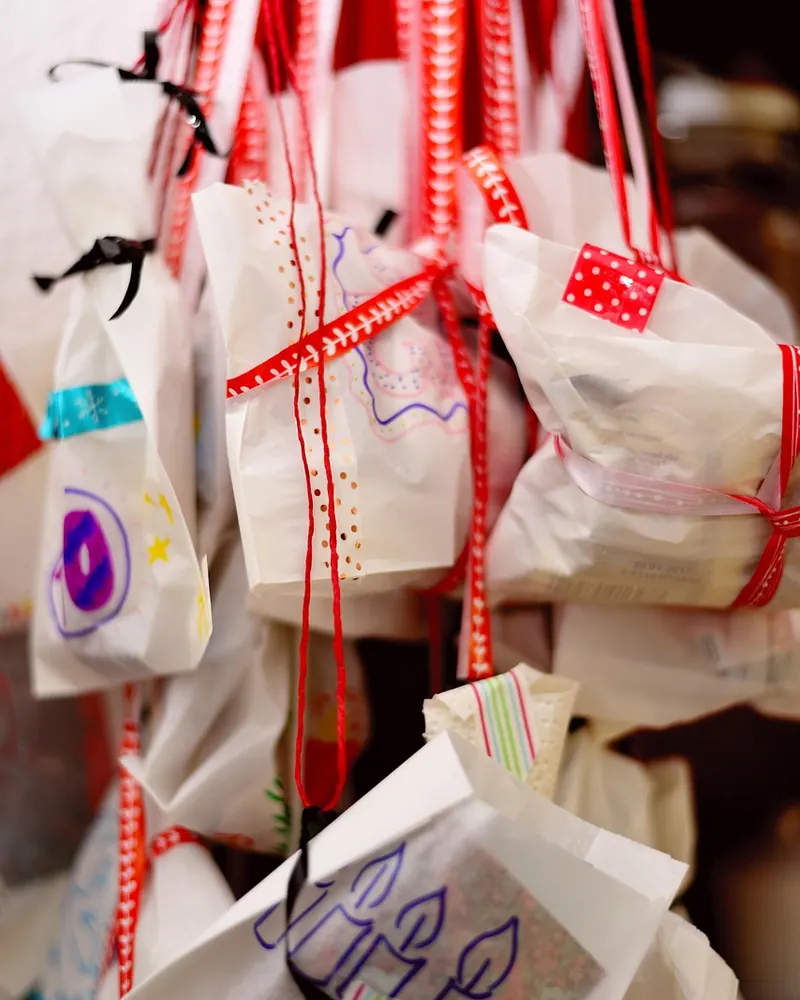
Paper and Envelope Calendars
These are the fastest options and the best ones for kids to help decorate. Most can be finished in an afternoon with a glue stick and leftover wrapping paper.
1. Hanging Kraft Envelope Calendar
Difficulty: Easy · Cost: $5–10 · Time: 45–60 minutes · Ages: 5+
Materials: 24 kraft or leftover envelopes, twine or ribbon, mini clothespins or a hole punch, number stickers or a marker, washi tape, treats or activity slips
- Write or sticker the numbers 1 through 24 on the envelopes. Decorate lightly with washi tape or stamps so the number stays readable.
- Punch a hole in each top corner, or plan to clip them, and fill each envelope before you hang it.
- String twine along a wall, mantel or doorway and clip or thread the envelopes in order.
- Open one envelope a day. Flatten and save them if you want to refill the same set next year.
Tip: Start on December 1 for a classic 24-day calendar. If you prefer the liturgical start, Advent Sunday in 2026 falls on November 29, so add a “0” or bonus envelope.
2. Paper Bag Village
Difficulty: Easy · Cost: $3–8 · Time: 60 minutes · Ages: 4+
Materials: 24 brown lunch bags, markers, scraps of wrapping paper, glue, washi tape, a little rice or dried beans for weight (optional)
- Fold the top of each bag over like a roof and cut a simple peak if you want a house shape.
- Draw windows and doors, or glue wrapping-paper “roofs,” and add a clear number on each facade.
- Drop in a treat or activity slip and, if the bags stand on a table, add a spoonful of rice in the bottom so they do not tip.
- Line the houses up on a mantel, bookcase or windowsill like a tiny street and take one home each day.
Tip: This is a great table project for kids who like to draw. Keep small candy and beans away from children under three.
3. Clothespin Countdown Line
Difficulty: Easy · Cost: $4–8 · Time: 30 minutes · Ages: 4+
Materials: 24 wooden clothespins, acrylic paint or markers, twine, 24 small bags, tags or folded notes
- Number the clothespins 1 to 24 with paint or a bold marker. Let them dry completely.
- Clip the pins in order along a length of twine, then clip a small bag or tag under each pin.
- Hang the line across a window, hallway or kitchen wall.
- Take down one bag a day and leave the pin on the line so the numbers still look complete.
Tip: Unfinished wood pins also look nice with just a stamped number. For more pin crafts, see our DIY Christmas ornaments.
4. Toilet Paper Roll Tubes
Difficulty: Easy · Cost: under $5 · Time: 45 minutes · Ages: 5+
Materials: 24 cardboard tubes, wrapping paper or paint, ribbon, number stickers, tissue paper to tuck inside
- Wrap or paint each tube and let it dry. Cap one end with a small paper circle or a folded edge.
- Add a number, drop in a wrapped candy, joke or activity slip, and close the open end with tissue and ribbon.
- Stand the tubes in a crate, glue them into a tree shape on a poster board, or hang them from a branch.
- Open one tube a day and recycle the cardboard when you are done.
Tip: Save tubes through November so you are not buying extra packaging.
5. Paper Chain of 24 Links
Difficulty: Very easy · Cost: under $3 · Time: 30 minutes · Ages: 3+
Materials: Construction paper or leftover wrapping paper, glue stick or tape, a pen, 24 tiny notes
- Cut 24 strips of paper about 8 by 1.5 inches. Write a number and a tiny activity or treat note on the inside of each strip.
- Glue them into a chain in reverse order, with 24 at the top, so you tear off the next day from the bottom.
- Hang the chain in a doorway. Each morning, tear off one link.
Tip: This is the fastest calendar in the list and a good classroom or last-minute option. Preschoolers can glue while an adult writes the notes.
Boxes, Tins and Dollar-Store Calendars
If you want something that sits on a counter and looks a little more finished, start with containers you can number and reopen. A muffin tin or a cookie sheet is a calendar hiding in a cupboard you already own.
6. Matchbox or Jewelry-Box Drawers
Difficulty: Easy · Cost: $6–12 · Time: 60–90 minutes · Ages: 8+ (adult cutting)
Materials: 24 empty matchboxes or a cheap set of small cardboard gift boxes, paint or wrapping paper, glue, number stickers, a tray or shallow box to hold them
- Wrap or paint each box and let it dry. Keep the drawers sliding freely.
- Add a number to each drawer front and fill with a folded note or a very small treat.
- Glue or arrange the boxes in a grid, a tree shape or four rows of six on a tray so they can be moved as a set.
- Open one drawer a day. Store the tray flat so nothing slides out.
Tip: Empty matchboxes from a craft pack are easier than saving kitchen matches for weeks.
7. Muffin Tin Calendar
Difficulty: Easy · Cost: $8–15 if you need a tin · Time: 30 minutes · Ages: 3+
Materials: A 24-cup mini muffin tin or two 12-cup tins, cupcake liners, number circles, tissue or parchment, treats or notes, ribbon if you will hang it
- Set a liner in each cup and drop in a treat or rolled activity slip.
- Cover each cup with a numbered paper circle, a scrap of tissue, or parchment held with a little tape or a sticker.
- Set the tin on the kitchen counter, or tie ribbon through the edge to hang it.
- Peel one cover a day. Wash the tin and reuse it next year.
Tip: If you only have a 12-cup tin, do two rounds: 1–12, then refill for 13–24.
8. Dollar Store Bucket or Box Tower
Difficulty: Easy · Cost: $10–20 · Time: 45 minutes · Ages: 5+
Materials: 24 paper treat boxes, favor bags, or small buckets from the dollar aisle, paint or ribbon, number labels, a tray or crate
- Number each container clearly on the front or lid.
- Fill them with a mix of small toys, stickers, notes and a few sweets so it is not only candy.
- Arrange them on a tray, in a crate, or stacked as a pyramid that still lets you reach the next number.
- Let kids find the day’s number rather than working strictly left to right, which keeps younger siblings engaged.
Tip: Our Dollar Tree Christmas crafts list has more cheap containers and ornaments you can reuse as fillers.
9. Mason Jar Lid Ornaments
Difficulty: Medium · Cost: $10–15 · Time: 90 minutes · Ages: 8+
Materials: 24 mason jar lid rings, cardstock circles, punch or scissors, ribbon, glue, small notes or flat treats, a sturdy branch in a vase or a hanging rod
- Cut 24 cardstock circles that fit inside the lid rings and number them 1 to 24.
- Glue or sandwich a note or flat treat behind each circle, then tie a ribbon through each ring.
- Hang the lids on a branch, rod or hook board in numerical order.
- Take one down each day and hang it back empty, or collect the rings in a bowl to reuse next year.
Tip: This doubles as decoration. Skip hard candy behind glass-weight lids if very young children can reach the branch.
10. Cookie Tin or Pizza-Pan Magnets
Difficulty: Easy · Cost: $8–15 · Time: 40 minutes · Ages: 6+
Materials: A large cookie tin or cheap pizza pan, 24 small magnets, numbered paper or wooden circles, washi tape or glue dots, notes or bags
- Number 24 circles and glue a magnet to the back of each, or magnet a small bag under each number.
- Place them around the tin or pan in a wreath or tree shape, with a bow at the top if you like.
- Hang the pan on a hook or stand it on the kitchen counter.
- Take one magnet a day. The pan stores flat when the season is over.
Tip: If you use a tin with a lid, the leftover numbers can live inside on January 1.
Kids and Family Activity Calendars
Not every door has to hide candy. Some of the most used calendars are the ones filled with things to do together, a daily book, or a small object from a walk. These ideas are especially good for families who already have a chocolate calendar in the house and want a second countdown that does not add more sugar.
11. Felt Pocket Wall Hanging
Difficulty: Medium · Cost: $10–18 · Time: 2 hours · Ages: 6+ with help
Materials: A felt or canvas backing about 20 by 30 inches, scraps of felt for 24 pockets, fabric glue or a simple running stitch, ribbon for hanging, numbers
- Cut 24 felt pockets large enough for a folded note or a small toy.
- Glue or stitch them onto the backing in rows, then add numbers to each pocket.
- Slide the day’s surprise into the pockets before December, or fill as you go if you want flexibility.
- Hang it with ribbon on a hook. Fold and store the hanging when you are done; it can last for years.
Tip: This is one of the best no-candy options. Fill pockets with jokes, kindness dares and “choose the movie” tickets.
12. Mitten or Sock Clothesline
Difficulty: Easy · Cost: $8–15 · Time: 30 minutes · Ages: 3+
Materials: 24 inexpensive mittens, baby socks or leftover Christmas stockings, twine, clothespins, number tags
- Clip the mittens or socks along a twine line and add a number tag to each.
- Tuck a treat, note or tiny ornament into each one.
- Hang the line low enough for kids to reach safely, away from a fireplace or stove.
- Empty one mitten a day. Keep the set in a bin for next year, or donate unused kids’ mittens after the holiday if that was the point.
Tip: A mixed set of thrifted mittens looks more charming than a perfectly matched row.
13. Book Advent
Difficulty: Easy · Cost: $0–varies · Time: 20 minutes to wrap · Ages: Any age
Materials: 24 picture books, library books, or books you already own, wrapping paper or paper bags, a number on each
- Wrap 24 books, or slip each one into a numbered paper bag, and stack them in a basket.
- Let your child unwrap one book a day and read it together at bedtime.
- Library books work if you wrap loosely and keep due dates in mind.
- On the last day, a slightly longer story or a new book makes a nice finish.
Tip: This is the calmest calendar on the list and a favorite for families who already have more sweets than they need. Pair it with ideas from our Christmas crafts for kids on weekend afternoons.
14. Activity Scroll Calendar
Difficulty: Easy · Cost: $3–6 · Time: 40 minutes · Ages: 5+
Materials: A roll of kraft paper or 24 index cards, markers, a jar or a clipboard, tape
- Write 24 simple activities, one per card or in numbered boxes on a long scroll: bake cookies, call a grandparent, drive to see lights, make an ornament, wear ugly socks.
- Roll the paper or stand the cards in a jar.
- Do one activity each day, or let a child draw a card if you want a flexible order for busy weekdays.
- Mix free activities with a few “bigger” ones on weekends so the calendar does not demand a field trip every afternoon.
Tip: Write a few backup indoor activities for bad weather. See our paper plate crafts and handprint crafts for easy fills.
15. Nature Walk Envelope Set
Difficulty: Easy · Cost: $3–5 · Time: 30 minutes to make, plus walks · Ages: 4+
Materials: 24 envelopes or bags, a marker, a basket, and later: pine cones, acorns, pretty leaves or smooth stones (only what is legal and safe to collect)
- Number 24 envelopes and decorate them. Leave them empty.
- On some of the days, go outside, find one small treasure, and tuck it into that day’s envelope. Other days can hold a drawing of something you saw.
- Keep the growing collection in a basket on the table.
- On Christmas Eve, spread everything out and look back at the month of walks.
Tip: This works beautifully alongside our pine cone crafts for kids: a cone collected on day 6 can become an ornament on the weekend.
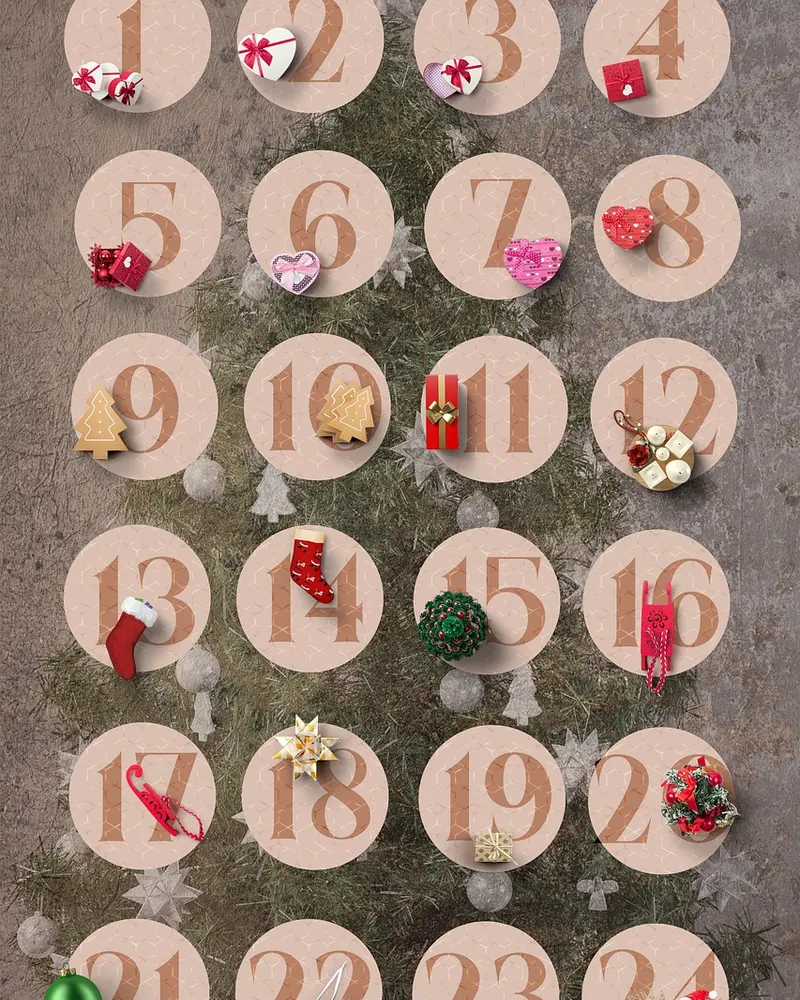
Wood, Fabric and Reusable Calendars
If you like a project that comes out again every November, build one of these. They take longer, they look more like decor, and they store in a closet when January comes. A well-made peg board or felt hanging will outlast a stack of paper bags by many seasons.
16. Wooden Bead or Peg Board (Reusable)
Difficulty: Medium · Cost: $15–25 · Time: 2–3 hours · Ages: Adult build; kids decorate
Materials: A rectangular board, 24 cup hooks or pegs, wood stain or paint, number tiles or wooden circles, ribbon loops on small bags
- Sand and paint or stain the board. Mark two or three even rows for 24 hooks.
- Screw in the hooks and add hanging hardware on the back.
- Number small bags, envelopes or wooden discs and hang them in order.
- Refill the bags each November. This is the version that can last a decade if you store it dry.
Tip: Buy an unfinished board from the craft aisle rather than cutting lumber if you want this to stay a one-evening project.
17. Scrap-Wood Cubby Shelf
Difficulty: Advanced · Cost: $20–40 · Time: half a day · Ages: Adults
Materials: Scrap boards, nails or screws, wood glue, clamps, paint, 24 small boxes or bags that sit in the cubbies
- Build or upcycle a shallow set of cubbies, or divide a deep picture ledge with thin spacers so you have 24 openings.
- Paint it, add numbers to the cubby edges, and let it dry fully.
- Mount it securely to a wall stud, then add a bag or box in each opening.
- Refill every year. This is a good “make once, use forever” project if you like weekend woodworking. See our wood crafts DIY ideas for simpler builds first.
18. Wrapped-Box Pyramid
Difficulty: Easy · Cost: $8–15 · Time: 60 minutes · Ages: 6+
Materials: 24 small cardboard boxes or leftover gift boxes in mixed sizes, wrapping paper, ribbon, number tags, a tray
- Wrap each box and add a number tag. Mix sizes so the stack looks like a tiny pile of presents.
- Fill before you wrap, or wrap the lids separately so you can refill.
- Stack them in a pyramid on a tray that you can move when you wipe the table.
- Take the next number each day without toppling the rest; a tray with a lip helps.
Tip: Use leftover scraps from DIY Christmas gifts so the paper matches the rest of the house.
19. Gift-Wrap Pouch Garland
Difficulty: Easy · Cost: $5–10 · Time: 50 minutes · Ages: 7+
Materials: Leftover wrapping paper or fabric scraps, a stapler or sewing machine, ribbon, number tags, tape
- Cut 24 rectangles, fold each in half, and staple or sew the sides to make a pouch, leaving the top open.
- Add a ribbon loop and a number tag, then slip in a note or flat treat and fold the top over with a sticker.
- Clip or hang the pouches along a garland, staircase or mantel.
- Open one a day. Fabric pouches can be washed and reused; paper ones recycle easily.
20. Printable Numbered Doors on a Poster
Difficulty: Very easy · Cost: under $5 · Time: 25 minutes plus printing · Ages: 5+
Materials: A large poster board or foam board, a printed or hand-drawn set of 24 “doors,” glue stick, craft knife (adults only), treats or notes behind each flap
- Draw or print 24 small doors, windows or presents on paper and glue the top edge only onto the board so each one lifts like a flap.
- Number the doors, then slip a tiny note behind each one, or write the activity directly under the flap.
- Prop the board on a mantel or attach it to the fridge.
- Lift one door a day. Photograph the finished board if your child is proud of the drawing.
Tip: This is the best last-minute calendar if it is already November 30. A child can color the doors while you write the notes.
What to Put Inside
The fill matters as much as the craft. A mix keeps the month from feeling like 24 tiny bags of the same chocolate. Try:
- Activities: pick the Christmas movie, bake one tray of cookies, drive to see lights, write a card, build a blanket fort, make an ornament, have hot cocoa for breakfast, call a grandparent.
- Making: one sticker sheet, a pipe-cleaner kit, a mini craft bag, or a coupon for a weekend project from our easy crafts for toddlers or ornament lists.
- Reading: a wrapped picture book or a chapter in a longer holiday book.
- Kindness: a simple dare such as “leave a note for the mail carrier” or “choose a food-bank item.”
- Treats: a few, not all 24, and check for allergies before you fill anything a visiting child might eat.
- Tiny toys: only if they are age-appropriate and not a choking hazard for younger siblings in the house.
Write the activities on slips now, while you are thinking clearly, and save the messy or expensive ones for weekends. Leave two or three “free choice” days so a sick day or a travel day does not break the calendar.
DIY Advent Calendar FAQ
When should I start a DIY advent calendar in 2026?
Most homemade calendars start on December 1 and finish on December 24. If you follow the liturgical calendar, Advent Sunday in 2026 is November 29, so you can add a first envelope that weekend and still open 1–24 in December. Start making the calendar in mid-November so you have time to fill it.
How many days should a homemade advent calendar have?
Twenty-four is the usual DIY count. Some families add a 25th door for Christmas morning. A shorter 12-day calendar (December 13–24) is a good option if you are starting late or making one with very young children.
What can I put in an advent calendar besides candy?
Activity slips, jokes, stickers, a daily book, a kindness dare, a tiny ornament, or a note that says “you pick the music at dinner.” Many families use a mix: treats on some days, things to do on the others.
Can kids make a DIY advent calendar themselves?
Yes, especially the paper chain, envelope line, paper bag village and poster-board doors. Adults should handle craft knives, hot glue, and any small parts for children under three. Let kids decorate and help fill, which is half the fun.
How do I make a reusable advent calendar?
Choose felt pockets, a wooden peg or hook board, a muffin tin, or a set of fabric pouches. Build it once, store it dry after Christmas, and refill the bags or notes each November. Avoid glueing the treats in permanently.
The Bottom Line
You do not need a complicated workshop project to have a beautiful advent calendar. A string of numbered envelopes, a muffin tin, or a paper chain can be finished in an afternoon and hung before December 1. If you want something you can bring out every year, a felt pocket hanging or a simple peg board is worth the extra evening. Fill the days with a mix of small activities and a few treats, keep little parts away from toddlers, and start now, while there are still a couple of weekends left before the countdown begins.
